
How to Organize Your Kitchen on a Budget Without Buying More Stuff
Kitchen organization gets expensive fast. You start with one bin, then another, then shelf risers, drawer inserts, jars, baskets, labels, and suddenly a simple reset turns into a shopping project. But most kitchens do not need more stuff first. They need fewer unnecessary items, better grouping, smarter zones, and a more realistic system. This guide will help you organize your kitchen on a budget by starting with what you already have.
Cost
$0 to start
Time
30–90 min per area
Difficulty
Easy
Renter Friendly
Yes
Why Kitchen Organization Gets Expensive So Fast
The kitchen is one of the easiest places to overspend in the name of getting organized. There are always more products to buy: clear bins, turntables, drawer inserts, food containers, labels, shelf risers, hooks, racks, and carts.
The problem is that buying storage too early often just helps you store too much more neatly. In many kitchens, the real issue is too many duplicates, awkward groupings, cluttered counters, and storage that does not match the way the household actually cooks and eats.
Quick Answer
The easiest way to organize your kitchen on a budget is to remove what you do not need, group similar items together, create simple zones based on how the kitchen is used, and reuse what you already have before buying anything new.
If you remember one rule, make it this: organize first, shop last.
Before You Start
Pick one problem area instead of trying to reset the whole kitchen at once. That might be one cabinet, one drawer, the pantry, the area around the stove, the food storage container zone, or the under-sink cabinet.
Starting small keeps the project realistic and makes it much easier to finish. Gather three simple categories before you begin: Keep, Relocate, and Remove. You can use a box, grocery bag, laundry basket, or an empty section of the table. One more rule before you start: do not buy organizers yet.
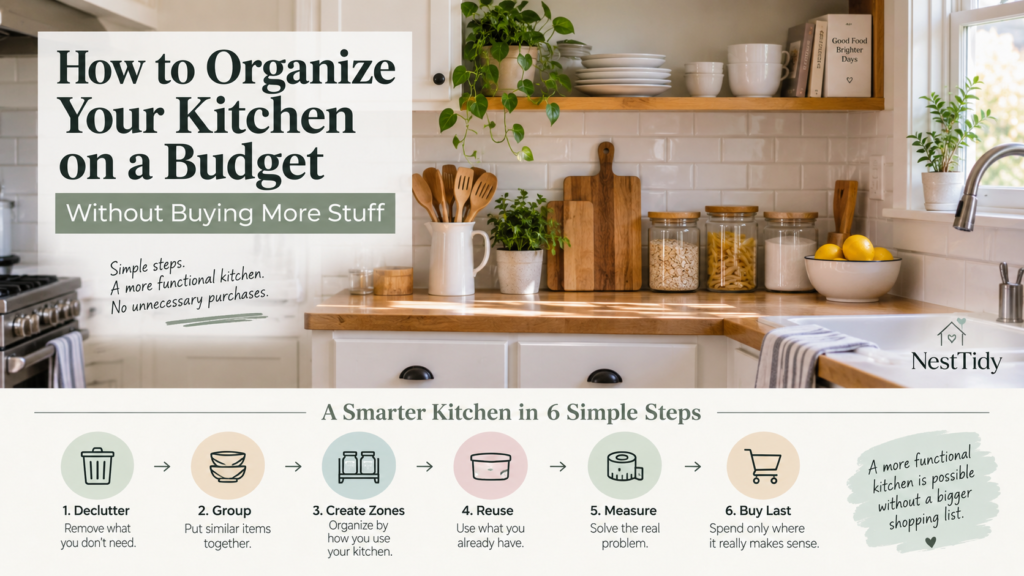
01
Remove What the Kitchen Does Not Need
Create space before you try to organize it.
Start by pulling out items that clearly do not belong in the space or no longer serve a useful purpose.
- Expired pantry items
- Duplicate utensils
- Extra mugs or water bottles you never choose
- Lids with no matching container
- Gadgets you forgot you owned
- Chipped or damaged items
- Things that belong elsewhere in the home
Done when: the obvious extras are gone and the area feels lighter than when you started.
02
Group Similar Items Before You Organize
See the real categories before deciding where they should live.
Put similar items together so you can see what you actually have. Useful categories may include baking supplies, cooking utensils, spices, food containers, snacks, lunch items, coffee and tea, dishwashing supplies, and cutting or prep tools.
Grouping first often reveals the real issue. Maybe snacks are spread across three places, food containers take up more space than expected, or oils and spices are stored far from the stove for no good reason.
Done when: similar items are grouped together and you can clearly see what each category includes.
03
Build Simple Kitchen Zones
Store things close to where you actually use them.
A practical kitchen usually works best with simple zones such as a prep zone, cooking zone, serving zone, food storage zone, cleaning zone, and breakfast or drink zone.
- Prep zone: cutting boards, knives, mixing bowls, measuring tools
- Cooking zone: oils, spices, pans, cooking utensils
- Serving zone: plates, bowls, glasses, everyday dishes
- Food storage zone: containers, foil, bags, wraps
- Cleaning zone: dish soap, sponges, towels, trash bags
- Breakfast or drink zone: coffee, tea, mugs, quick morning items
NestTidy Tip
A kitchen does not have to look perfect to work better. It just has to reduce friction during normal daily routines.
Done when: each main category has a logical home based on where and how it is used.
04
Use the Storage You Already Have Better
Make current cabinets, drawers, and shelves work harder.
Before buying anything, look at whether your current storage is being used well. Keep frequently used items in easy-to-reach places and move rarely used serving pieces or backup supplies to less convenient areas.
- Move everyday plates closer to the dishwasher.
- Keep cooking tools near the stove.
- Place rarely used serving pieces higher up.
- Store snacks where the household actually reaches for them.
- Stop using premium shelf space for items used once a month.
Done when: the storage you already have is working more logically than before.
05
Repurpose Before You Buy
Test a free solution before paying for a new one.
Check what you already own before buying a new organizer. Small baskets, empty bins, sturdy food boxes, jars, trays, mugs or crocks, extra containers, and even magazine holders can sometimes solve a storage problem perfectly well.
Not every reused item has to be beautiful. If it keeps a category together and makes the kitchen easier to use, it is doing its job.
Done when: you have tested at least one reuse solution before spending money.
06
Measure the Problem, Not Just the Cabinet
Know exactly what a new product would need to fix.
If you still think you need a storage product, pause before buying. Measure the items you are trying to store, the usable cabinet depth, door clearance, and how much room you need to reach things easily.
Ask whether a bin would solve the problem or simply hide it, and whether you need an organizer at all or just less stuff.
Done when: you know exactly what kind of solution is needed, if any.
07
Spend Only Where Friction Remains
Buy one useful fix, not a matching set.
Now, and only now, decide whether you need to buy anything. A smart budget purchase solves a specific point of friction.
- A shelf riser if a cabinet is wasting vertical height
- One turntable if a deep corner shelf hides small pantry items
- A drawer insert if utensils constantly mix together
- One bin if a category keeps falling apart on an open shelf
Think improvement, not perfection.
Done when: any item you buy has one clear job and solves a real frustration.
08
Keep Counters for Work, Not Storage
Give yourself usable workspace back.
The more items that live permanently on the counter, the less usable the kitchen feels. Keep counters mainly for food prep, cooking support, and a few frequently used essentials.
If something is always landing on the counter, that usually means it needs a better home somewhere else.
Done when: your counters feel more like workspace and less like backup storage.
09
Make the System Easy to Maintain
A simple system that lasts beats a perfect system that falls apart.
Categories should be easy to understand, returning things should not take effort, frequently used items should be easy to reach, and overflow should become obvious before it takes over the space.
You do not need a complicated labeled system for every shelf. You need a setup that supports grocery restocking, meal prep, cooking, and cleanup without creating extra work.
Done when: the setup feels easy enough to keep up without constant resetting.
Mistakes to Avoid
- Buying organizers before decluttering. That often means paying to store too much.
- Organizing by appearance instead of function. A beautiful pantry is not useful if everyday items are hard to reach.
- Over-containerizing. Too many little bins can make a kitchen more annoying to use.
- Trying to organize the whole kitchen in one day. One finished area is better than a huge half-done reset.
- Ignoring real household habits. If the system does not match how people cook, snack, unload groceries, or clean up, it will not last.
Frequently Asked Questions
What is the cheapest way to organize a kitchen?
The cheapest way is to declutter first, regroup items, create better zones, and reuse what you already have before buying organizers.
Do I need bins to organize my kitchen?
Not always. Many kitchens improve simply by removing extras, grouping categories better, and using cabinets and drawers more intentionally.
What should I organize first in the kitchen?
Start with the area that causes the most frustration, such as a junk drawer, pantry shelf, food storage container zone, or messy cabinet near the stove.
How do I organize a small kitchen on a budget?
Focus on keeping only what you use, creating simple zones, using vertical space better, and choosing only the most useful storage solutions if something still does not work.
Should everything be stored in matching containers?
No. Matching containers can look nice, but they are not required for a kitchen to function well. Utility comes first.
Take the Next Useful Step
A budget kitchen reset should not become another shopping trip.
Continue with How to Declutter Your Kitchen Without Making a Bigger Mess or How to Create Free Storage Using Things You Already Have.

